27 OctOrganize Your Winery
Having an organized winery can make wine making easier, less stressful and more fun. Even smaller spaces can be organized to make efficient use out of the space you do have. With a new baby on the way (our first) my wife and I decided to move our office downstairs, giving us an extra bedroom upstairs. This move chopped the winery space I had in half. After some carefull planning I now feel like I have more room. Below are some of the key areas I focused on. Improving my organization and layout in these areas has given me more working space and more storage space.
The Good, The Bad, and the Ugly
The Ugly
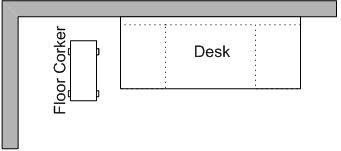
Before the move I had the following setup:
One rickety old desk which served as both my working area and my full carboy storage. This meant I usually had no working area at all, as the desk was chuck full of carboys. The desk had one drawer in it which served as my only storage for chemicals, corks, funnels etc. As you can imagine the drawer was always full and I had to dig through it to find anything. My floor corker (a must have) sat next to the desk. During bottling I had to stack the full bottles on the floor. There was also no running water, only a floor drain. The floor drain was usable but very messy when trying to empty a carboy into it. To fill anything with water I would have to trek upstairs then haul it back downstairs. Some improvement was definitely needed.
The Bad
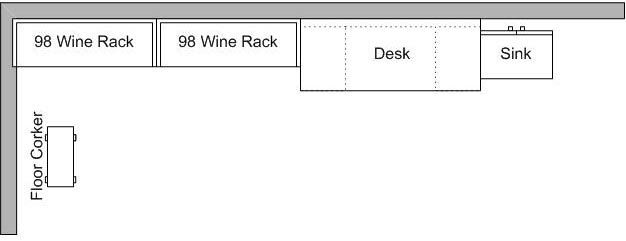
The first 2 steps in the improvement process were adding running water with a viable drain and bottle storage. I bought a utility sink kit from home depot and tapped into the nearby water pipes and drain lines. With all the parts included this project cost less than a hundred dollars. I was very pleased to never again run up the stairs to retrieve water. And the floor drain stays nice and clean as well. Bottle storage was next next problem. Wine cases tipped on their side on the floor wasn’t cutting it. I searched on-line for different racking systems. They all seemed very expensive, ranging from $1 to $3 per bottle. I figured I wanted to be able to shelve about 200 bottles. So $200 to $600 wasn’t going to work for me. So I asked my handy carpenter friend for some help. He came up with a rack system that stored 98 bottles for less than fifty bucks. I built two of them and painted them white. So now I had the water and the bottle storage problem solved. I felt like I was getting somewhere. Then the dreaded move came, cutting my floor space in half.
The Good
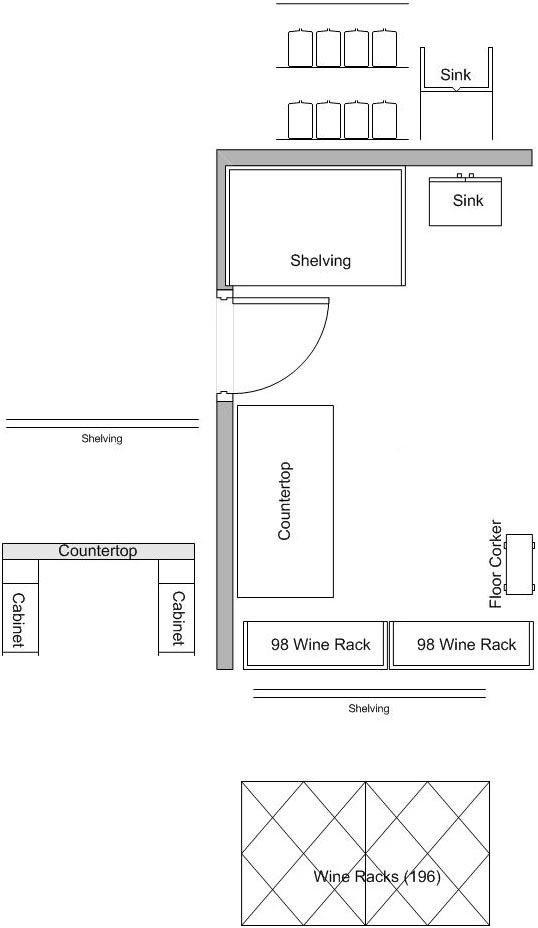
I figured as long as I was forced to move things around, I might as well make some more improvements. First step was to throw out the rickety desk and replace it with a new laminated counter-top ($23), with two twelve inch cabinets holding it up ($50 each). This counter-top would be my new working space. The cabinets also provided some storage for supplies. The space between the cabinets was open, leaving space for a garbage can and storage for some empty buckets. The next solution was to add carboy storage. I purchased 3 sheets of medium density fiber board 24 by 48 inches ($6 x 3) and 3 square support brackets for each of the top two shelves ($5 x 6). I installed the bottom two about 30 inches apart. I can store 16 six gallon carboys on these bottom two shelves. On the top shelve I can store 3 gallon carboys and other miscellaneous items. The only downfall to this setup is not being able to get a racking thief into the carboys. So from now on I am using a pump to rack and bottle. Even though I had much more storage already, I added a wire shelf above the counter-top, around the corner and over the wine racks. This shelf is great, it’s nice to have some things handy, right above your work area.
The results
Even though I have less raw floor space to use, I feel like my new winery is much better then the old one. With a little planning and effort you can maximize the space you do have, with out too much money, to make your winery fun and organized.


